

Posted by Annika Landis on Sep 9th 2021
Finding Your Balance: 5 Exercises to Improve Stability and Coordination
Hello Ski Post!
Over the summer, I had the privilege of helping coach the Craftsbury Masters training group in addition to a few junior practices. One thing I hear over and over again from the athletes is, “I wish I had better balance”, or “I want to feel more stable on my skis.”
I relate to them on this topic. Most of my natural balance comes from having a low center of gravity, the rest I’ve had to cultivate through intentional practice, which only became a consistent part of my training a few years ago when I was rehabbing from a broken foot. Adding balance and coordination exercises not only helped me heal faster, but also improved my ski stability and confidence.
Exercises like the ones below are easy to do at home and will add fundamental stability to your skiing and other athletic endeavors.
Why do Balance and Coordination Drills?
- Ski Efficiency: Balance is absolutely crucial in nordic skiing. You need to feel comfortable carrying your weight entirely on one leg in order to effectively maximize the glide time on each ski in both skate and classic.

Weight transfer in skating requires good balance on a gliding ski.
- Injury Prevention/Rehabilitation: Agility, which relies fundamentally on balance, coordination, and core engagement, will help keep you on your feet, whether you are running, skiing, biking, etc. These drills can also help to rebuild balance after an injury (check with your doctor first!!).
- Extra ‘Edge’: The more athletic and dynamic you can be on your skis the better. Skiing has many unexpected moments where having well practiced balance, quick reaction time, and mind/body coordination, can make a huge difference. From navigating mass starts, to avoiding crashes, to sprint tactics, to downhill skill, feeling stable on a fast gliding ski will give you the confidence to be decisive.
What Do I Need to do Balance Drills at Home?
- 1-2 Tennis Balls
- Balance Disc (substitute a folded yoga mat if you do not have a disc)
- 5-10 lb Dumbbell (or similarly weighted item i.e. gallon jug, brick/rock, etc.)
- Light Resistance Band
Drills:
For each exercise I describe the foundational movement and then suggest a series of “progressions” to make it harder. I prefer to do my balance exercises without shoes because I think it provides better flexibility and more strengthening of your foot muscles.
Apologies for the odd objects I use in a few of the demos. The GRP is currently in Oberhof, Germany for a speed camp and the medicine ball/dumbbell didn’t make the cut!
1. Single-Leg Stand - Stand on one foot for 30-60 seconds. Then switch to the other leg.
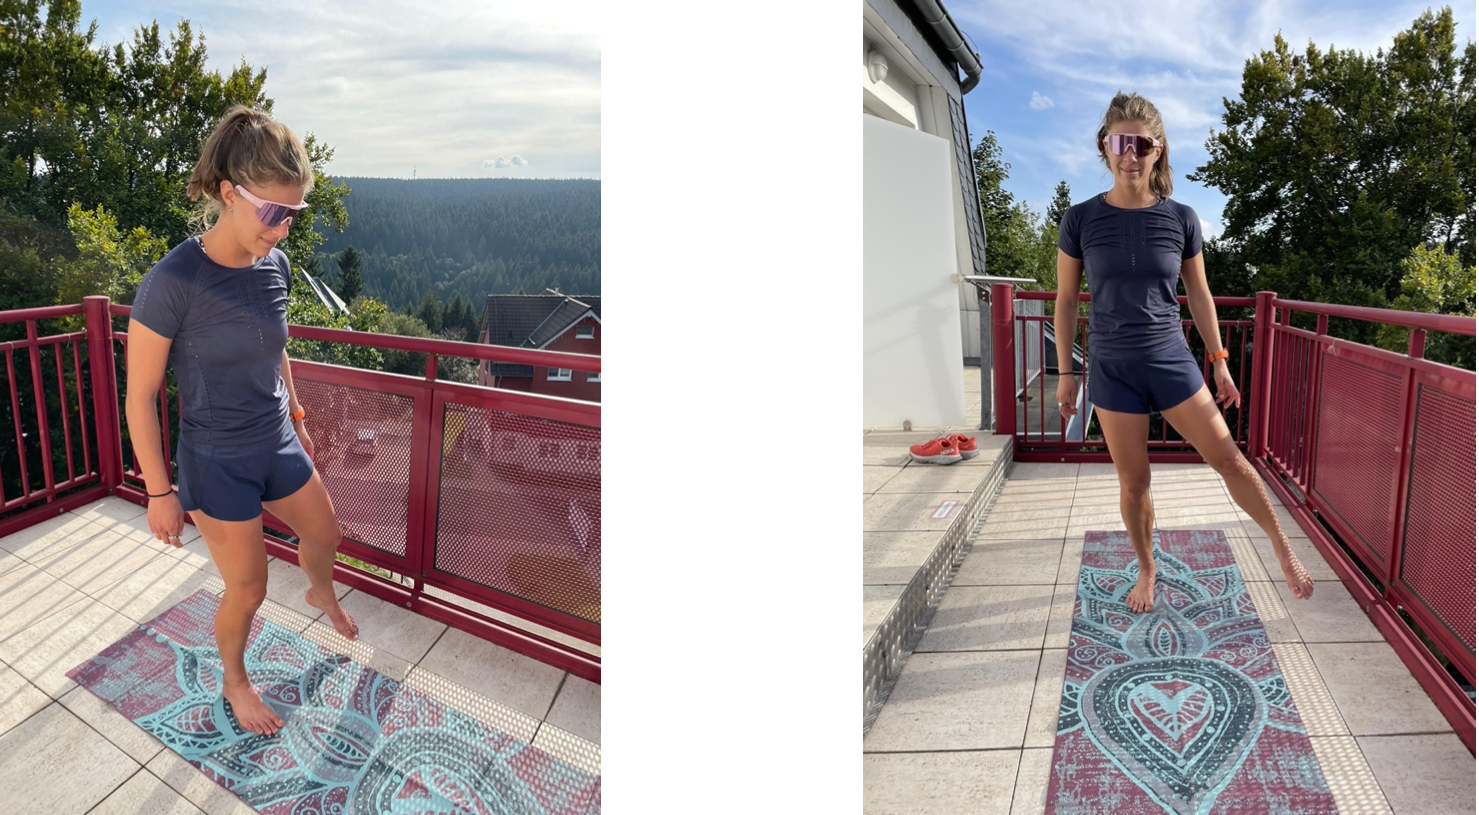
a. Progression: eyes closed, folded yoga mat/grass, balance disc, balance disc with
eyes closed.
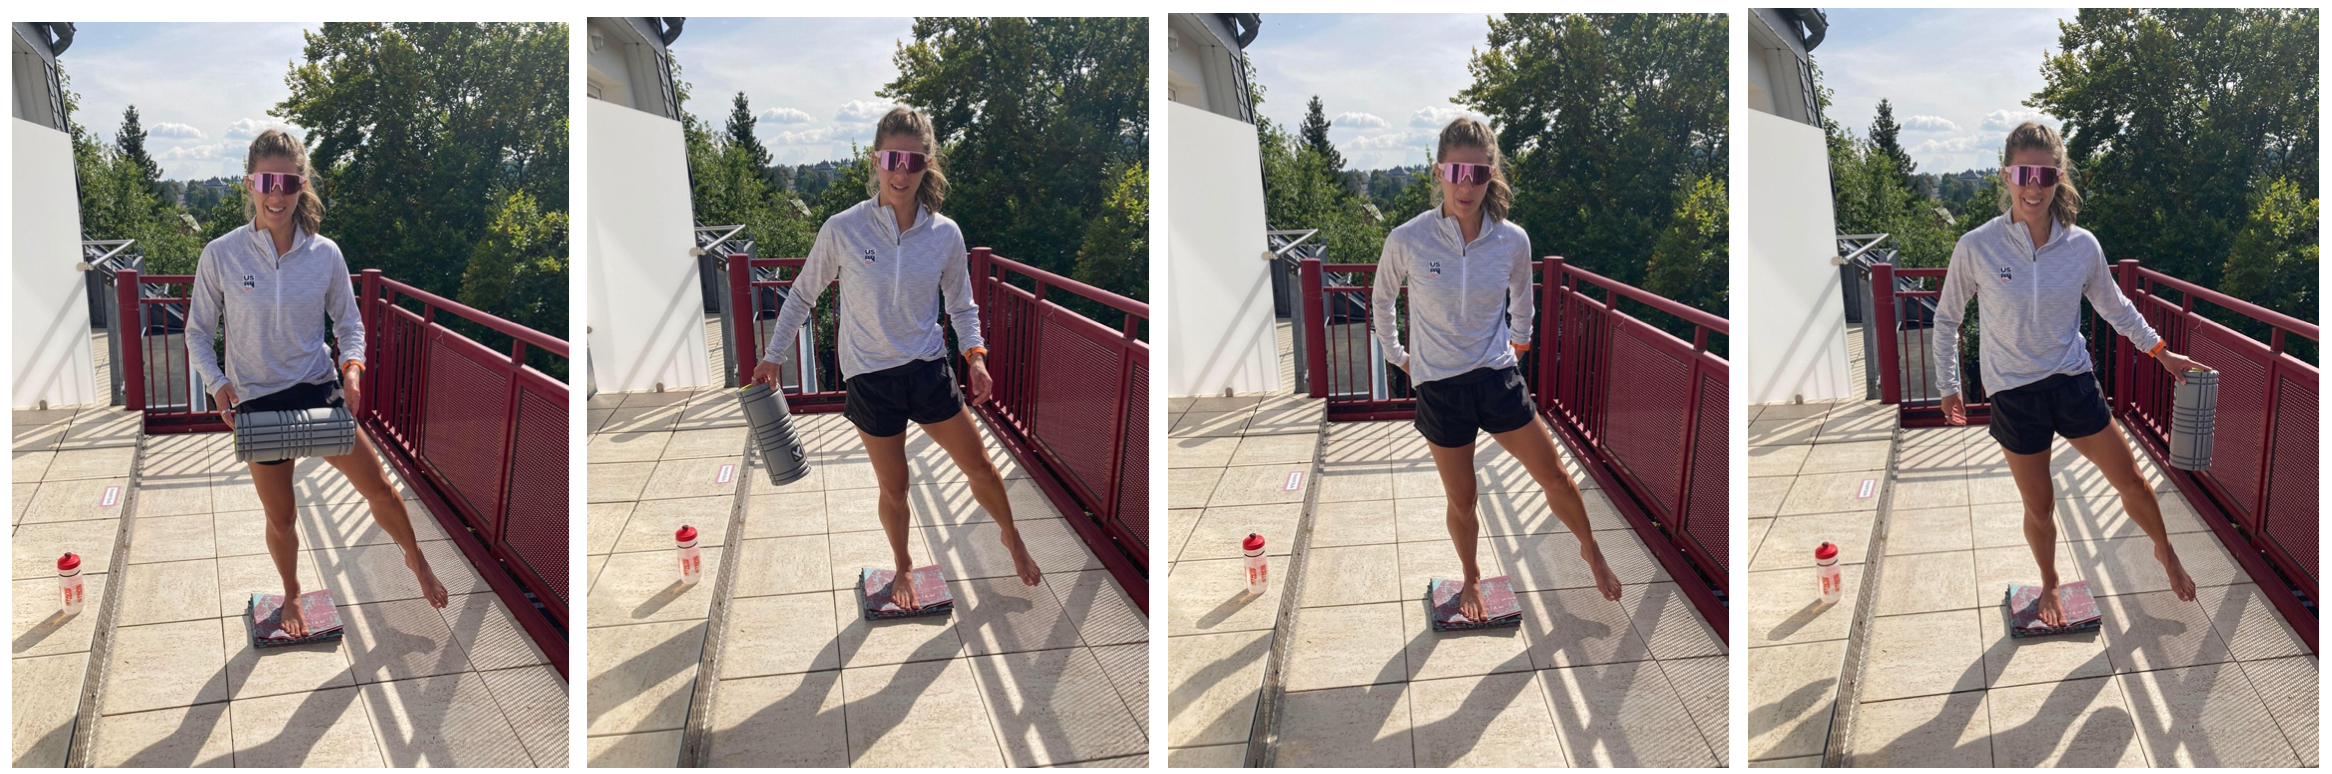
2. Helicopter Pass - Stand on one foot holding a dumbbell/kettlebell in front of you. While balancing on one foot, pass the weight behind your back and around to the front. Pass it each direction 5 times, then switch feet.
a. Progression: eyes closed, folded yoga mat/grass, balance disc, balance disc with eyes closed.
3. Ball Toss Against Wall - Stand on one foot ~ 1 ft. away from a wall. Facing the wall, throw a tennis ball against the wall as quickly as you can for about 30 seconds, then switch hands. Switch feet and do another 30 seconds with each hand.
a. Progression: balance disc, using two balls, throw with both hands at once.
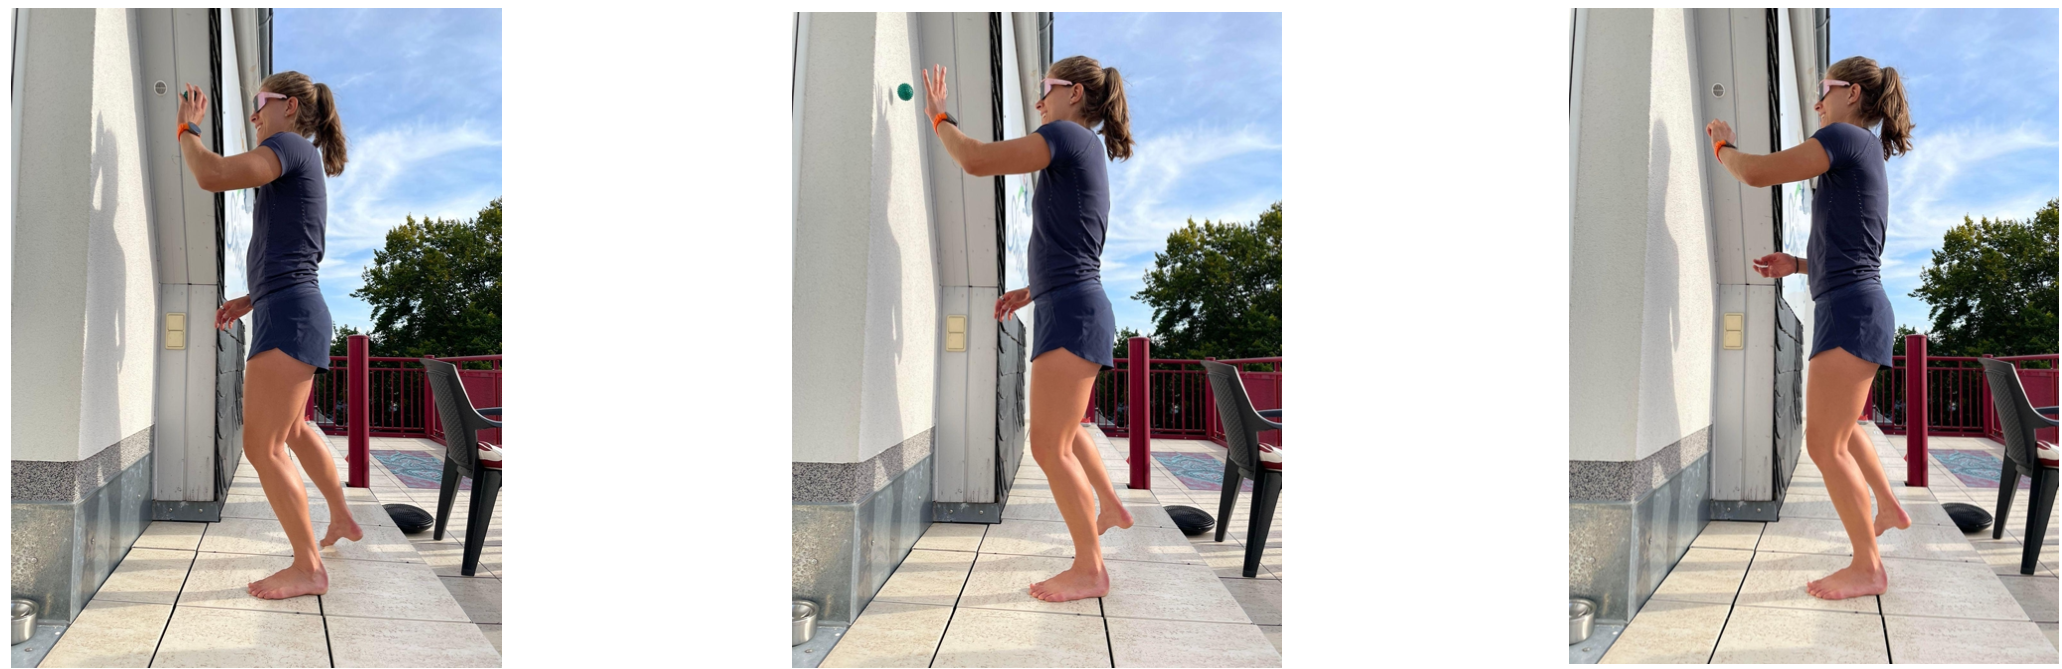
Sometimes I stand on my left foot and throw with my right or vice versa to activate both sides of my body at once.
*Bonus!* Ball Toss Against Ground - Stand on one foot. Throw the tennis ball against the ground as quickly as you can for ~ 30 seconds then switch hands. Switch feet and do another 30 seconds with each hand.
b. Progression: balance disc, using two balls, throw with both hands at once, juggle
4. Single Leg Pallof Press - Set up a resistance band (I use red or blue) about shoulder height around a sturdy pole. Move away from the pole until there is only a little slack in the band. Balancing on one leg, “push” your arms away from your body. Keeping your hands centered, bring your arms back towards your body in a controlled motion.
a. Progression: more resistance, balance disc
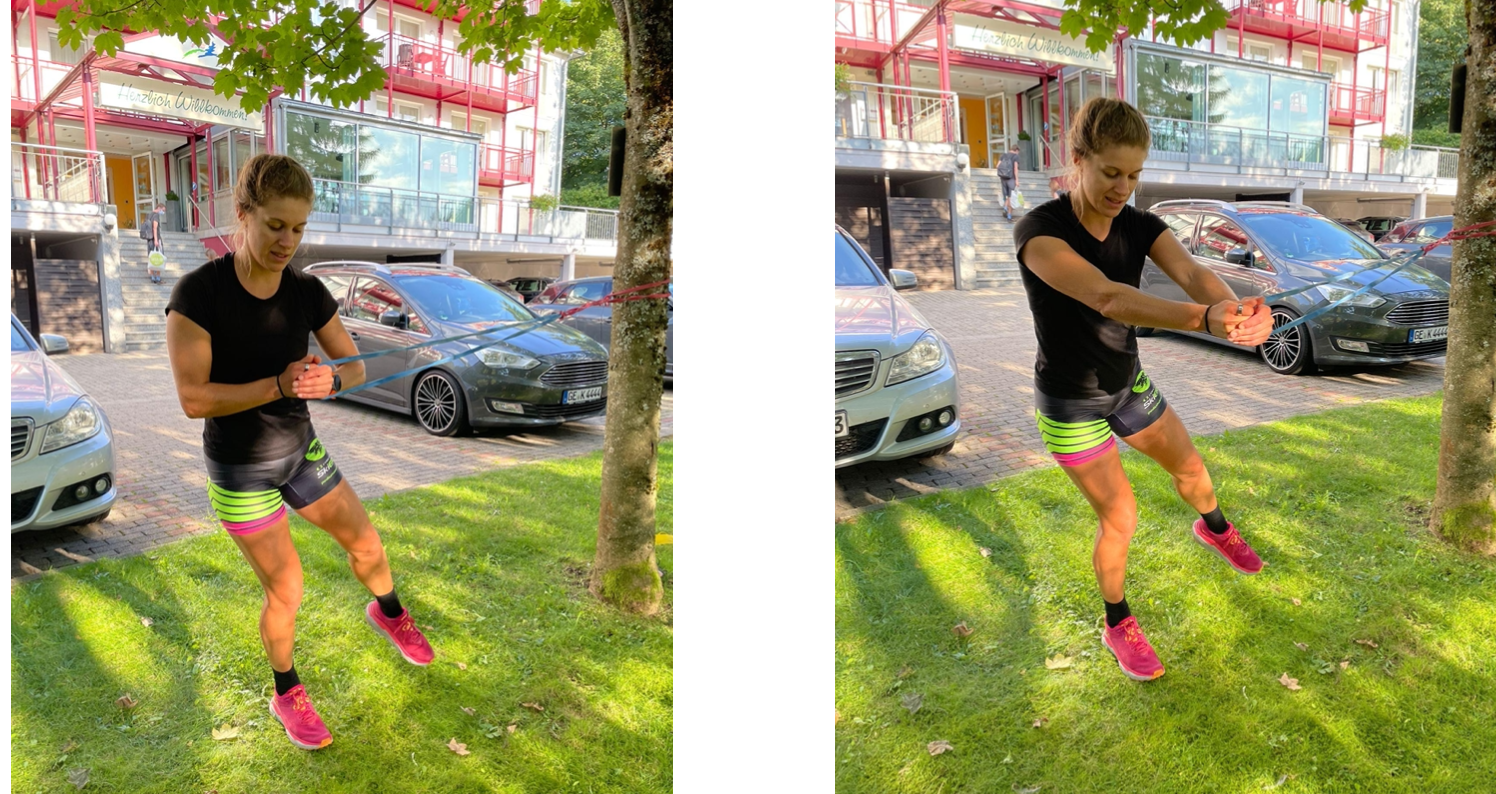
The band will want to pull you towards the pole so the key to this exercise is strong core engagement, controlled movements, and focus on keeping the hips facing forward. Adjust the resistance to make it easier/harder.
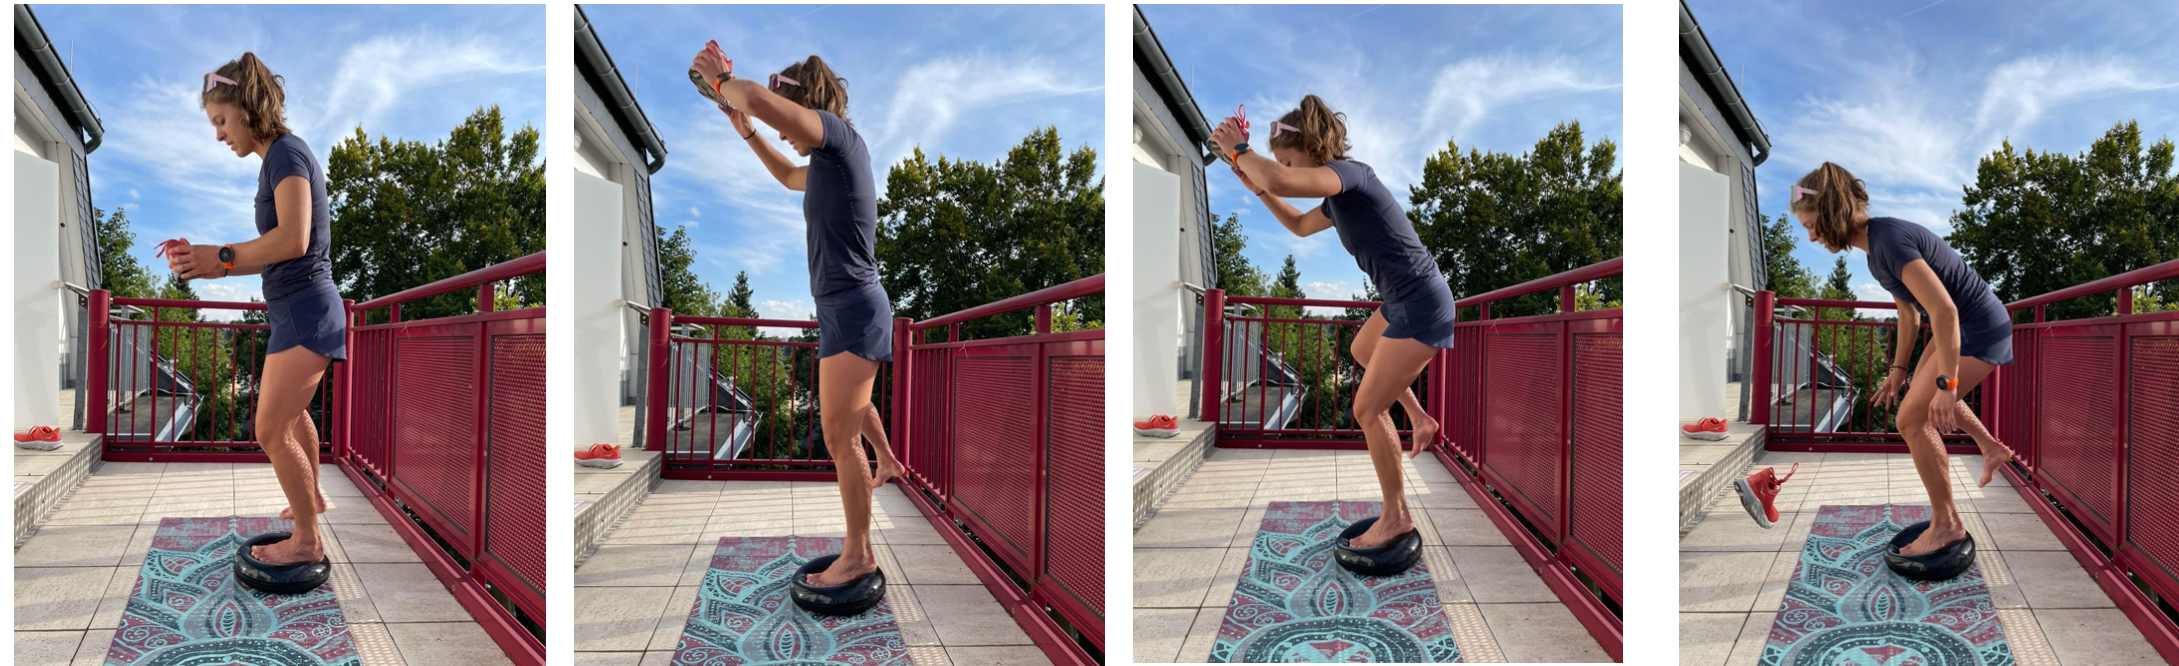
5. Single Leg Ball Slams - Balancing on one leg and holding a medicine ball (you can do a bodyweight movement to start), raise your arms above your head and in one motion, compress (crunch) down and slam the ball on the ground. *I had to use a shoe for this demo but keep in mind that a medicine ball will bounce back up, so be ready to catch it!
a. Progression: balance disc, heavier ball + more power
Things to Remember:
- Start in your comfort zone: Don’t hurt yourself by starting the hardest exercises first. Get comfortable with the more fundamental exercises before adding more challenging elements.
- Practice Good Form: Try to keep your core engaged and your hips square. If you wobble or put a foot down, “reset” good form before continuing.
- Be Creative and Challenge Yourself!: Do variations of exercises. It is important to switch up your routine so that your body doesn’t get really good at one movement and stops improving. Once a drill starts to feel easy and comfortable, challenge yourself!
Photo Caption: I personally like to do tennis ball drills with my black lab, or play tug of war with a stick while standing on a balance disc!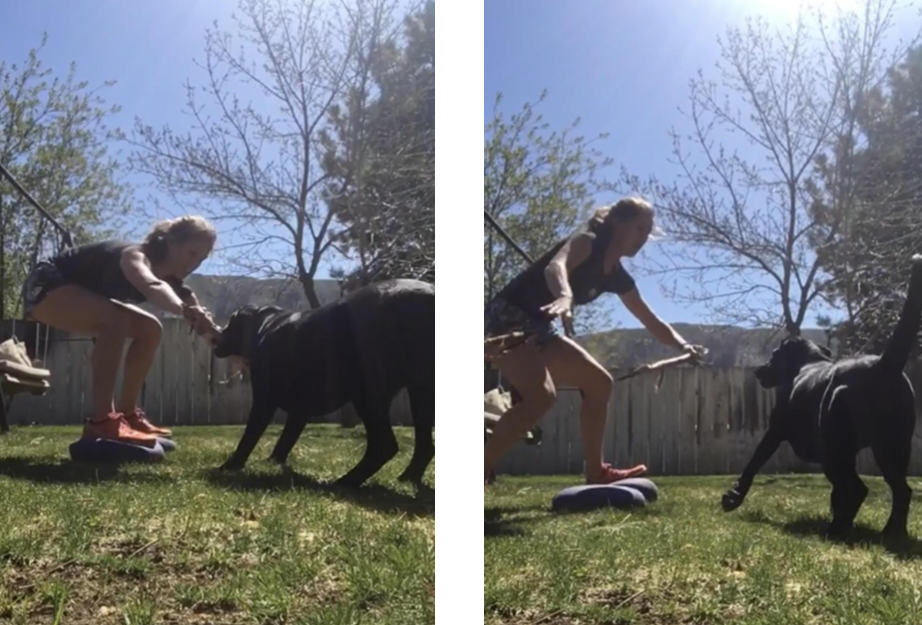
Here are a few other ideas:
- Partner Up! If you have a buddy, try both standing on one leg about 6-10 feet apart and toss (gently! It isn’t dodgeball!) a tennis ball back and forth to one another. Challenge your partner by throwing it wider to their left/right or above their head so they have to stretch to reach it while maintaining their balance.
- “Slow Fall” If you feel yourself losing your balance, see how long you can last before falling. Instinct says to put your foot down right away, but a “slow fall” will help improve the limits of your balance and you just might find that you can “save yourself” without touching the ground.
- Incorporation. Add a balance element into your regular strength routine. This can include: squats or russian deadlifts on balance discs, push press kneeling on a bosu ball, etc..
For other ideas, the internet/youtube is always a good place to start.
That’s all for now! I hope that these exercises help take your balance skills to the next level!
Looking for more like this? Try these...
https://enjoywinter.com/read-skipost/quick-stretch...